Home » The Complete DIY Guide to Installing Vinyl Wrap on a Car: Achieve Professional Results at Home
Recent Posts
The Complete DIY Guide to Installing Vinyl Wrap on a Car: Achieve Professional Results at Home
Introduction: Why Install Vinyl Wrap Yourself?
There’s something undeniably satisfying about transforming your car’s appearance with your own two hands. Whether you’re looking to refresh a tired daily driver, protect your vehicle’s factory paint, or express your creativity with a bold new color, vinyl wrapping offers an affordable and reversible solution .
Unlike a traditional paint job that can cost anywhere from $3,000 to $10,000 and requires weeks of downtime, a quality vinyl wrap typically costs between $2,000 and $7,000 when professionally installed—and even less if you do it yourself . Better yet, wraps can be installed in just a few days and removed later without damaging the original paint .
But here’s the honest truth: installing a car wrap isn’t easy. It requires patience, the right tools, and careful attention to detail . However, with today’s advanced vinyl technology—featuring air-release channels and repositionable adhesives—DIY enthusiasts can achieve remarkably professional results .
This guide walks you through every step of the process, from choosing the right materials to putting those final finishing touches. Let’s get started.
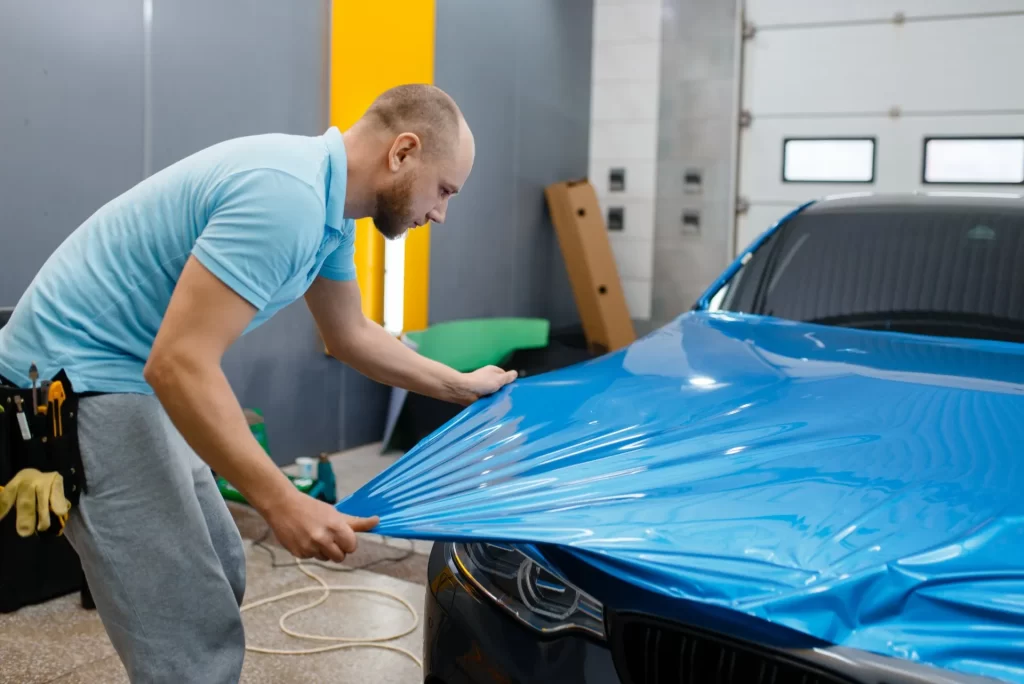
Table of Contents
What You’ll Need: Essential Tools and Materials
Before you begin, gather all the necessary supplies. Having everything on hand prevents interruptions that could lead to dust contamination or misalignment .
Tools Checklist:
High-quality vinyl wrap – Cast vinyl is recommended for automotive applications (more on this below)
Squeegees – Both rigid plastic and felt-edged varieties
Heat gun – Essential for making vinyl pliable around curves
Infrared thermometer – To monitor vinyl temperature and prevent overheating
Utility knives – With 30° and 60° replaceable blades
Tucking tool set – For reaching tight spaces and wrapping edges
Magnets – To hold vinyl in place during positioning
Masking tape – For marking areas and temporary holding
Tape measure – For accurate cutting
Microfiber cloths – Lint-free for cleaning
Isopropyl alcohol (70% or higher) – For final surface prep
Mild automotive soap – For initial washing
Clay bar – To remove embedded contaminants
Gloves – Protect your hands and prevent fingerprints on adhesive
Choosing the Right Vinyl
Not all vinyl wraps are created equal. For automotive applications, cast vinyl is the gold standard. Unlike calendared vinyl (which is better suited for flat surfaces), cast vinyl is designed to conform to complex curves without shrinking or lifting over time .
Reputable brands offer films with:
Air-release technology – Tiny channels that allow trapped air to escape during installation
Repositionable adhesive – Gives you some wiggle room if you don’t get it perfect on the first try
UV protection – Prevents fading and maintains color vibrancy
Pro tip: As one DIY enthusiast noted, “Cheaper vinyl won’t be so kind to you. If anything, the newer you are, the higher the quality vinyl you should buy” .
Step 1: Surface Preparation – The Foundation of Success
If there’s one step you absolutely cannot rush, it’s surface preparation. Even the highest-quality wrap will fail if the surface isn’t perfectly clean .
Wash Thoroughly
Start with a thorough hand wash using automotive soap and plenty of water. Remove all dirt, road grime, and any existing wax or sealants. Rinse completely and dry with microfiber towels .
Decontaminate with a Clay Bar
Run a clay bar lubricated with detailing spray over every surface you plan to wrap. This removes embedded contaminants that washing alone can’t eliminate—things like industrial fallout, tree sap, and overspray .
Final Wipe-Down
Mix a 2:1 solution of water and isopropyl alcohol (or use a dedicated panel wipe). Wipe down every surface with this mixture using lint-free microfiber cloths, then immediately dry with a fresh cloth . Work in small sections to prevent streaks.
Remove Obstacles
For a truly professional finish, remove as many components as possible: door handles, mirrors, emblems, trim pieces, and even headlights if you’re comfortable doing so . This allows you to wrap edges cleanly and eliminates visible seams.
Why this matters: “Even the best wrap will fail if the surface isn’t perfectly clean. Contamination is the number one cause of adhesion failure” — Marcus Lin, Certified Wrap Installer & Trainer .
Step 2: Measuring and Cutting
With your vehicle prepped and clean, it’s time to prepare your vinyl.
Take Accurate Measurements
Measure each panel you plan to wrap and record the dimensions. When cutting your vinyl, always leave 5–6 inches of excess material around all edges . This extra material gives you something to hold onto during positioning and ensures you can wrap around edges completely.
Consider Your Environment
Choose a clean, controlled workspace. A garage is ideal—it protects you from wind (which can blow dust onto adhesive) and direct sunlight (which can make vinyl too stretchy and hard to handle) . The ideal working temperature is around 68°F (20°C) .
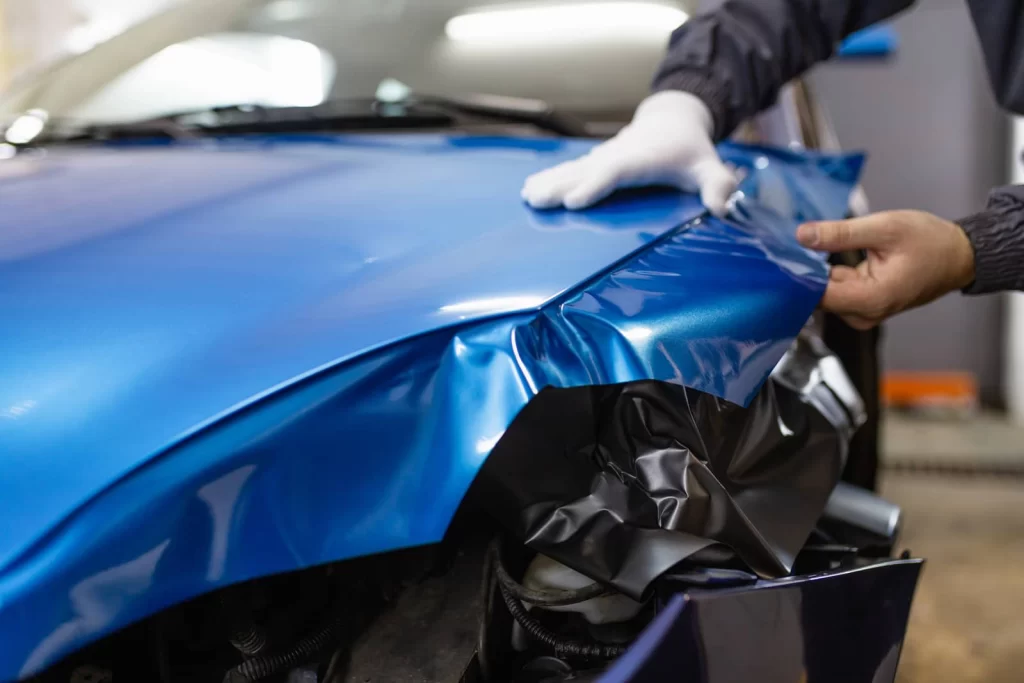
Step 3: Application – From Center Outward
Now for the main event. This is where patience becomes your best friend.
The Hinge Method
For large panels like hoods or roofs, use the “hinge method”:
Position your cut vinyl over the panel and secure the top edge with masking tape
Peel back the bottom half of the backing paper
Fold the exposed vinyl back on itself (creating a “hinge”)
Carefully lay the exposed section onto the panel, starting from the center and working outward
Gradually remove the remaining backing while smoothing the vinyl down
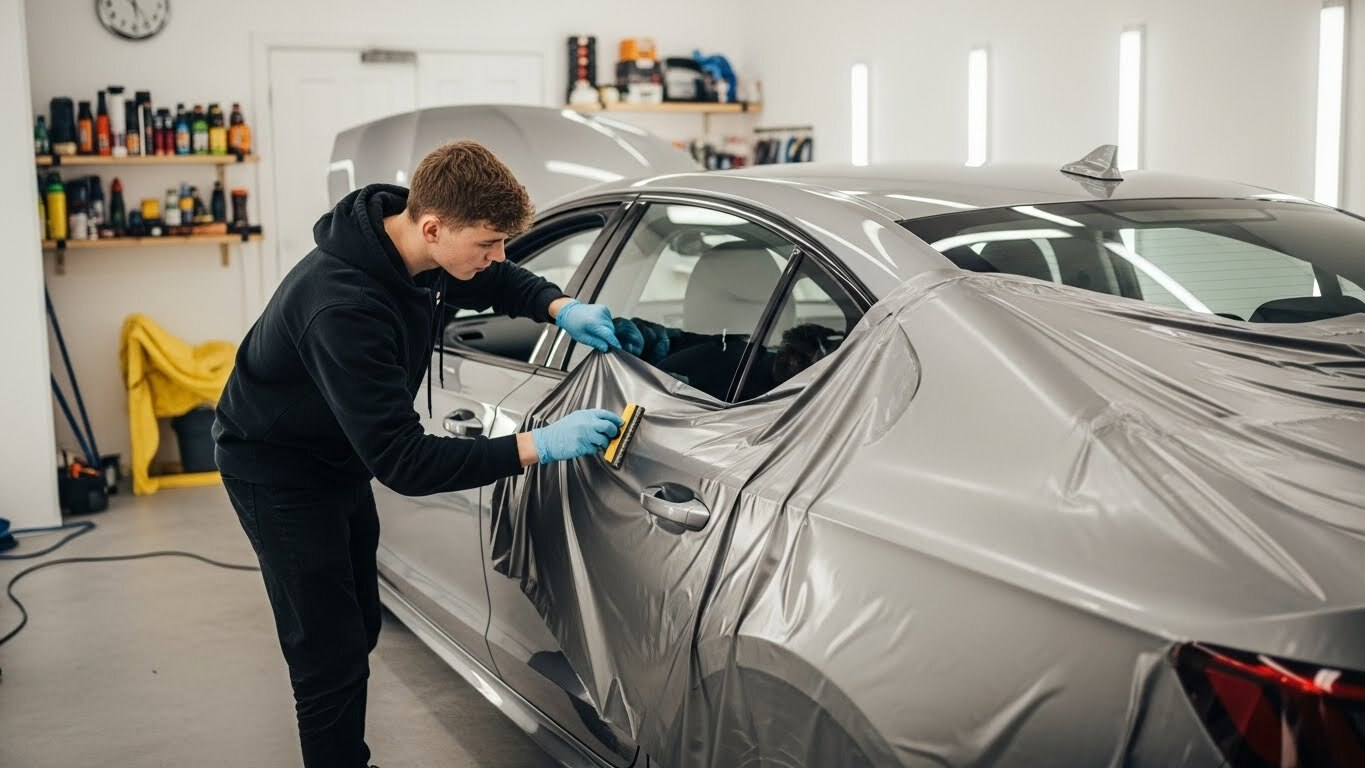
Squeegee Technique
Hold your squeegee at a 45° angle and apply firm, overlapping strokes from the center toward the edges . This pushes air and any excess adhesive solution toward the perimeter where it can escape.
Work methodically—each stroke should slightly overlap the previous one to ensure complete contact.
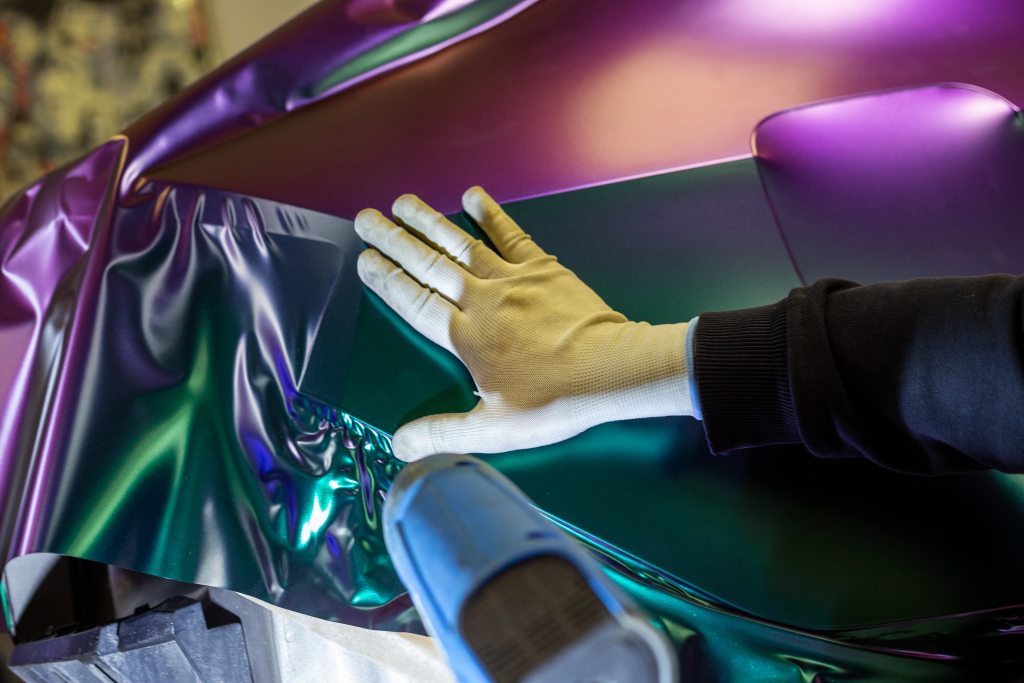
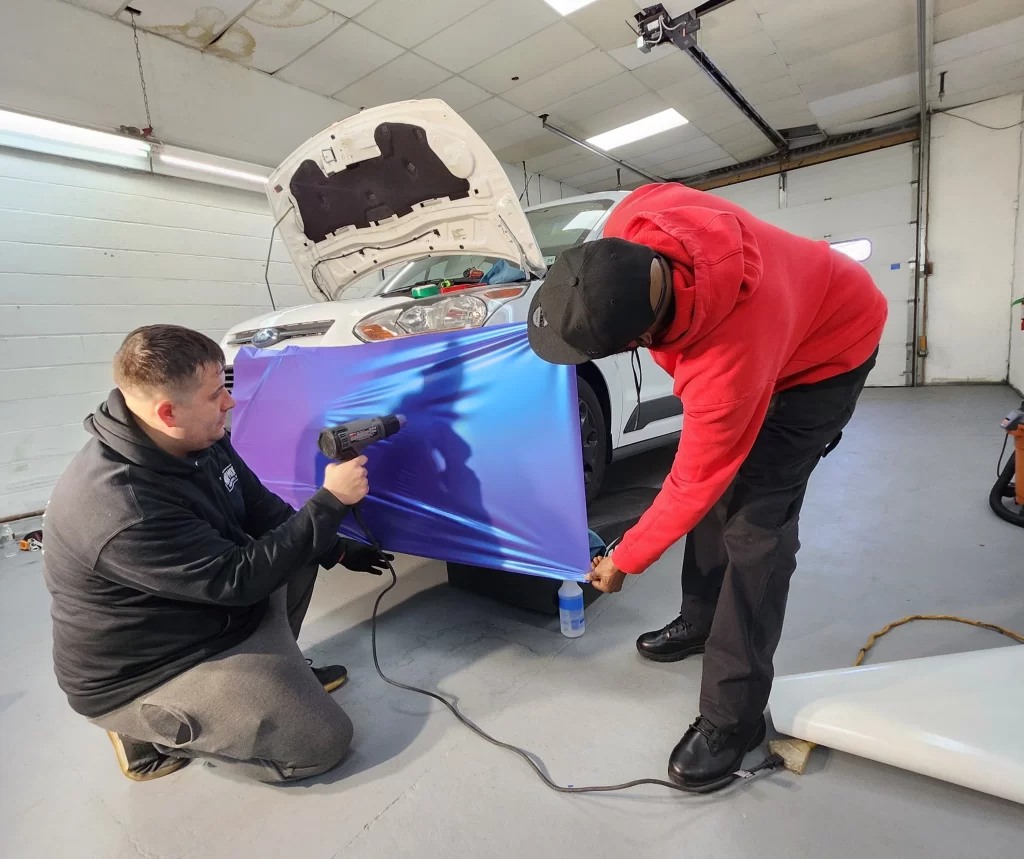
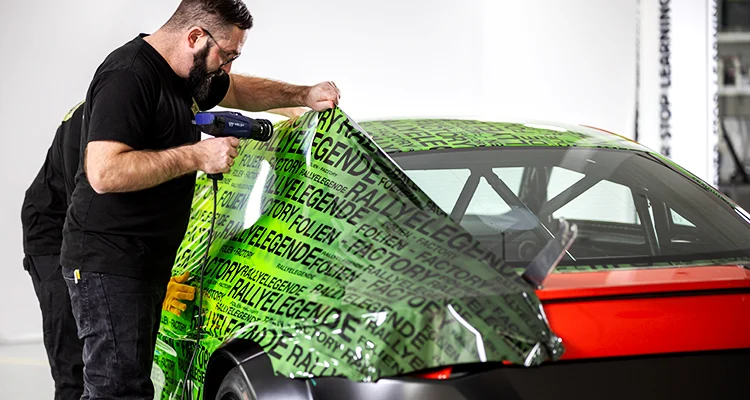
Tackling Curves and Recesses
When you encounter complex curves (like bumpers, side mirrors, or door handles), reach for your heat gun. Warm the vinyl to make it pliable, then gently stretch it to conform to the shape .
Critical tip: “Your goal should be to use the heat gun as little as possible. Resist the urge!” . Overheating can weaken the adhesive and cause the vinyl to shrink back later. Use an infrared thermometer to keep temperatures in check—most vinyl begins to lose its “memory” around 180°F (82°C) .
For deep recesses, consider using inlays—small separate pieces of vinyl applied inside the recess—rather than trying to force a single sheet into a complex shape .
Step 4: Trimming and Finishing
Once the vinyl is smoothly applied, it’s time to clean up the edges.
Trim Excess Material
Using a sharp utility knife (with a fresh blade), carefully trim excess vinyl along panel edges, seams, and around openings. Leave about 1/8 inch of material to wrap around edges .
For cutting along trim lines or window edges, use Knifeless Tape if available—it allows you to create clean cuts without risking damage to the underlying paint .
Wrap Those Edges
Use your heat gun to warm the edge of the panel and the vinyl, then use a squeegee or tucking tool to firmly press the vinyl around to the backside . This prevents moisture and debris from getting underneath later.
Post-Heating
After installation, go over the entire panel with your heat gun (maintaining proper temperature) and re-squeegee. This “post-heating” activates the adhesive for a long-term bond and relieves any tension in the vinyl .
Step 5: Final Inspection
Stand back and examine your work in good lighting. Look for:
Small air bubbles – Pop these with a pin or air-release pen and smooth down
Lifted edges – Reheat and press firmly
Any areas of poor adhesion
If you find a significant problem, don’t panic. Quality vinyl can be lifted and reapplied within a reasonable window—just work slowly and carefully .
Aftercare: Making Your Wrap Last
Congratulations! Your car looks amazing. Now let’s keep it that way.
The First Few Days
Do not wash your vehicle for at least 48 hours—some experts recommend waiting 7–10 days . The adhesive needs time to fully cure, and washing too soon can compromise the bond .
Regular Maintenance
Hand wash only – Use a pH-neutral automotive shampoo and soft microfiber mitts
Avoid automatic car washes – The brushes can scratch and lift edges
Skip pressure washers – High-pressure water can force its way under the wrap, causing bubbles or peeling
Clean spills immediately – Bird droppings, tree sap, and bug splatters can stain if left too long
Protecting the Finish
For wrapped vehicles, avoid traditional waxes and polishes—they can leave residue or cause hazing, especially on matte finishes . Instead, use products specifically formulated for vinyl wraps, such as spray waxes or quick detailers designed for wrapped surfaces .
How Long Will It Last?
With proper installation and care, a quality vinyl wrap typically lasts 5–7 years . Factors that affect longevity include:
Climate (extreme sun and heat accelerate fading)
Storage conditions (garage-kept wraps last longer)
Maintenance routine (regular gentle cleaning extends life)

Why Choose Decowell for Your Wrapping Needs?
At Decowell, we understand that protecting your vehicle’s appearance is about more than just looks—it’s about preserving value and expressing your personality. Our premium paint protection films and vinyl wraps are engineered to deliver exceptional clarity, durability, and ease of installation.
What Sets Decowell Apart:
Superior Optical Clarity – Our films maintain the true beauty of your vehicle’s paint with zero orange peel effect
Self-Healing Technology – Minor scratches disappear with heat exposure
UV Protection – Shields your paint from harmful rays that cause fading
Hydrophobic Properties – Water beads and rolls off, making cleaning easier
Professional-Grade Adhesives – Ensures reliable bonding without damaging paint upon removal
Whether you’re a first-time DIY installer or a seasoned professional, Decowell products are designed to help you achieve stunning results.
Explore the Decowell Collection – From crystal-clear paint protection films to vibrant color-changing wraps, we have the perfect solution for your next project.
Frequently Asked Questions
Q: Can I install vinyl wrap myself, or should I hire a professional?
A: Yes, you can definitely install vinyl wrap yourself—many enthusiasts do. However, be prepared for a learning curve. Start with smaller, flatter panels to build confidence before tackling complex curves. Quality materials and proper preparation make all the difference .
Q: How long does a vinyl wrap last on a car?
A: With proper installation and care, a quality vinyl wrap typically lasts 5–7 years. Budget wraps may only last 1–3 years, especially in harsh climates .
Q: Will wrapping my car damage the original paint?
A: No—in fact, it protects it. As long as the original paint is in good condition (not peeling or repainted) and the wrap is installed and removed correctly, your factory paint will be preserved. Wraps block UV rays and prevent minor scratches .
Q: Can I wash my wrapped car in an automatic car wash?
A: It’s strongly discouraged. Automatic car washes with brushes can scratch the vinyl and lift edges. Even “touchless” washes may use harsh chemicals that can damage the wrap. Hand washing is always the safest choice .
Q: How do I remove air bubbles after installation?
A: For small bubbles, use a pin to puncture the vinyl (at an angle, not straight in) and press the air out with a squeegee. For larger bubbles, you may need to lift the affected area slightly, reapply heat, and smooth it back down .
Q: What’s the difference between paint protection film and vinyl wrap?
A: Paint protection film (PPF) is primarily designed to protect the original paint from stone chips and scratches—it’s clear and often has self-healing properties. Vinyl wrap is mainly for changing color or appearance, though it does offer some protection as a bonus .
Q: Can I wrap over existing paint chips or rust?
A: Minor scratches and swirl marks are typically covered well. However, deep dents, rust spots, or flaking paint should be repaired first—they can telegraph through the wrap or trap moisture underneath, leading to bigger problems .
Q: How do I maintain a matte finish wrap?
A: Matte wraps require special care—never use wax or polish, as these will create unwanted glossy spots. Use cleaners specifically formulated for matte finishes and avoid any abrasive products .
Ready to Transform Your Ride?
Whether you’re protecting your investment with a clear bra or turning heads with a bold new color, proper installation is the key to long-lasting results. Follow this guide, take your time, and don’t be afraid to ask for help when you need it.
And when you’re ready for premium materials that make the job easier, visit Decowell—your partner in automotive protection and style.